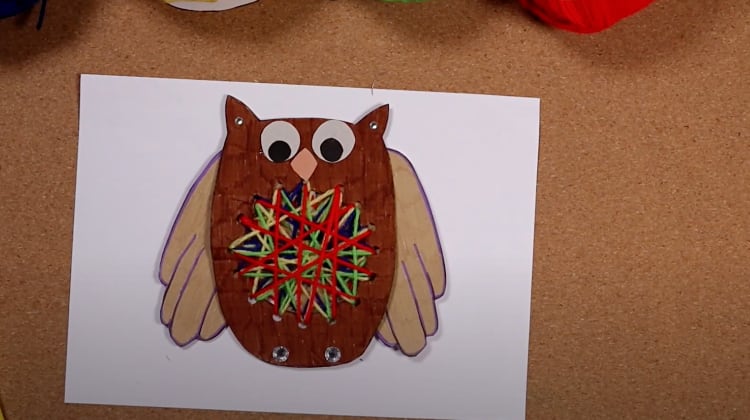
Let’s learn how to make a beautiful owl using cardboard and colored wool.
What you will need:
- cardboard boxes (look for cardboard boxes or packaging you have at home to recycle)
- wool in different colors of your choice
- glue
- glue tape
- scissors
- puncher
- felt tip pens
Let’s do it!
- Download the owl outline (see below) and cut it out.
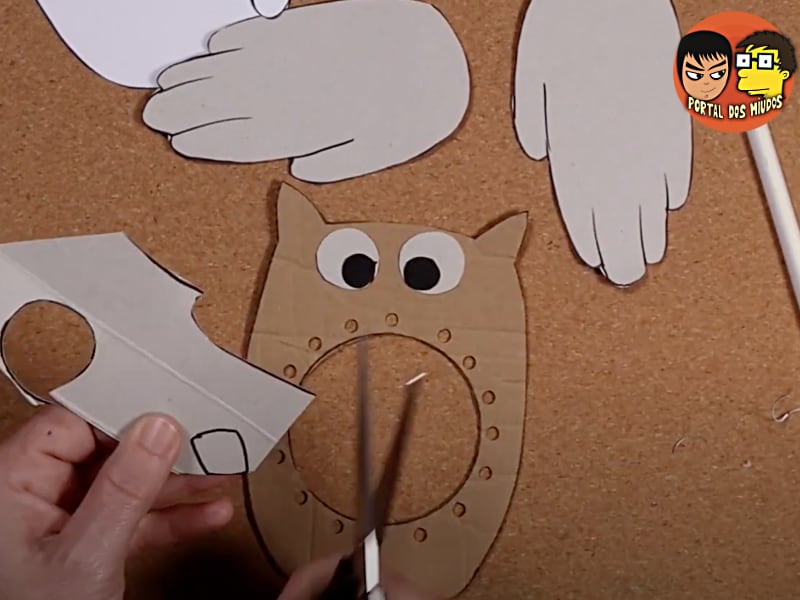
- Take the cardboard and use the cutout to draw the outline of the owl.
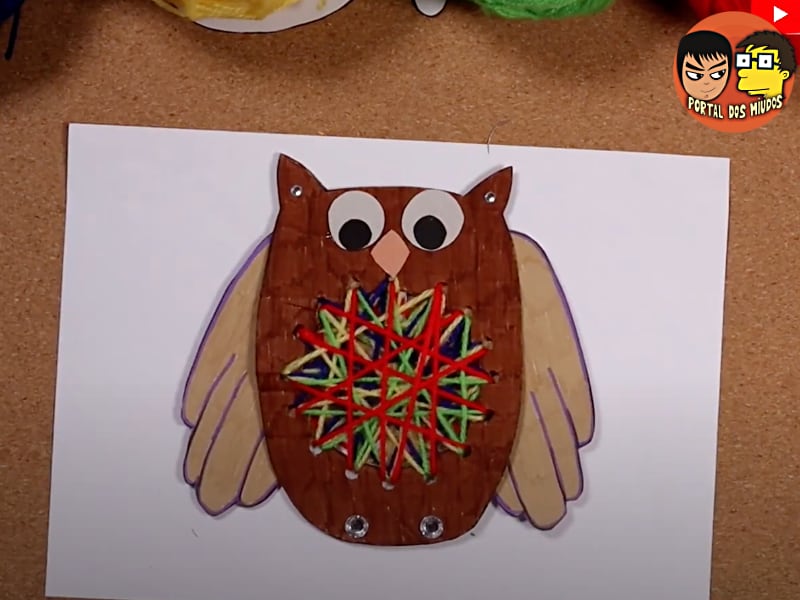
- In the center draw a circle (I used a cap). Around the circle draw about 16 dots where you will make holes.
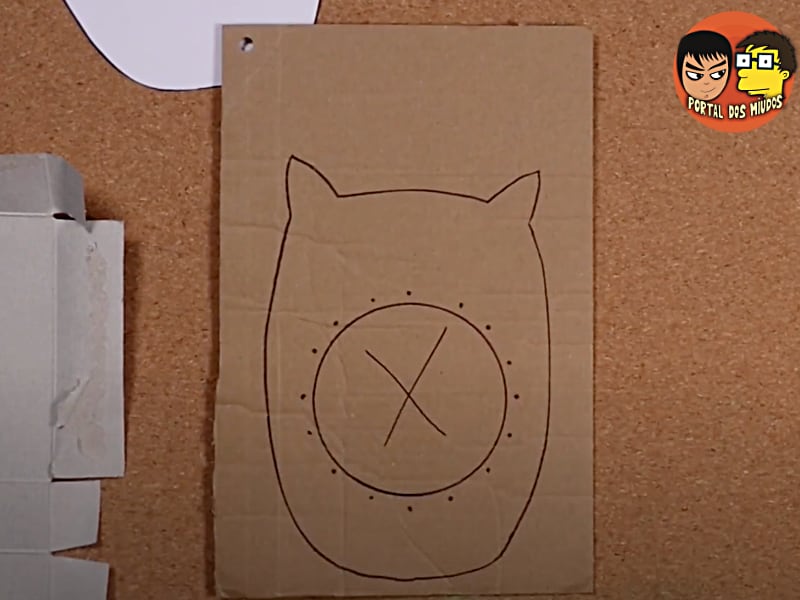
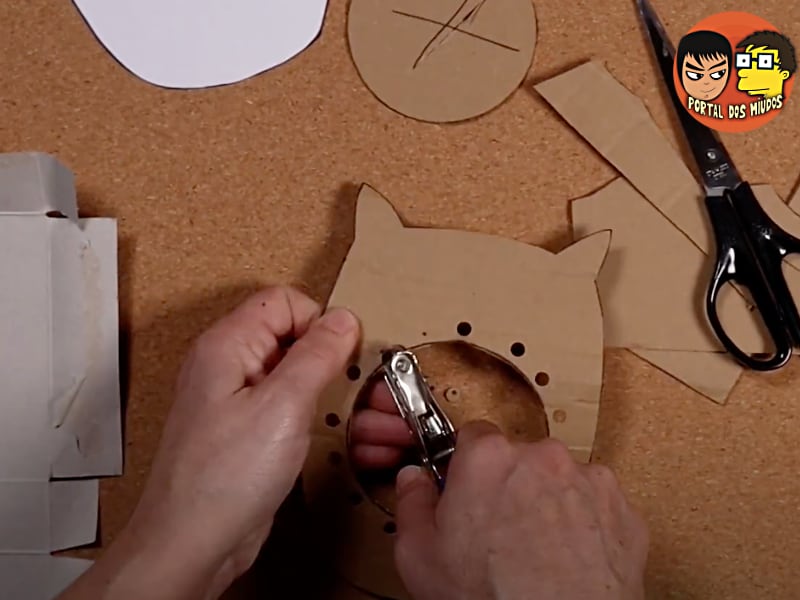
- Cut out the outline of the owl, then the circle, and punch holes in the points you marked around the circle. You can use a puncher.
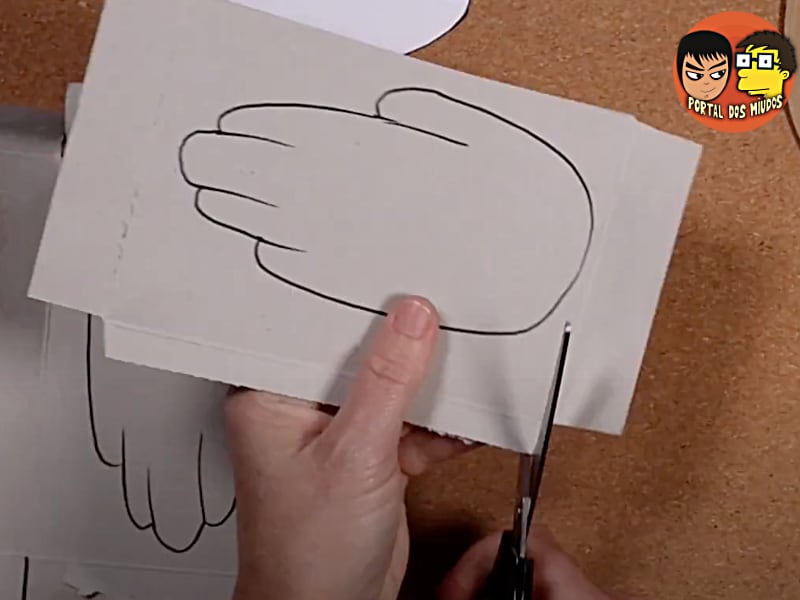
- Use one hand and outline it on a piece of cardboard; it will be used to make the owl’s wings. Do it in duplicate. Cut them out.
- On another piece of cardboard, draw two circles for the eyes and a diamond-like shape for the beak. Cut them out.
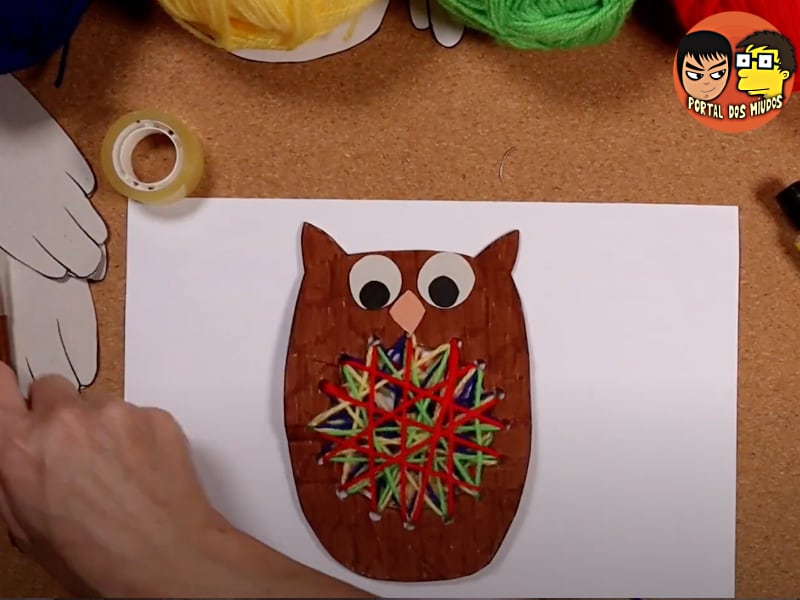
- Paint the owl’s body. I painted it brown.
- Cut a piece of yarn from each color you chose.
- Take one of the threads, pass it through one of the holes and tie a knot. Pass the thread through the holes as in the image below. Tip: At the end of the thread you can wrap/glue a piece of glue tape to make it easier to pass through the hole.
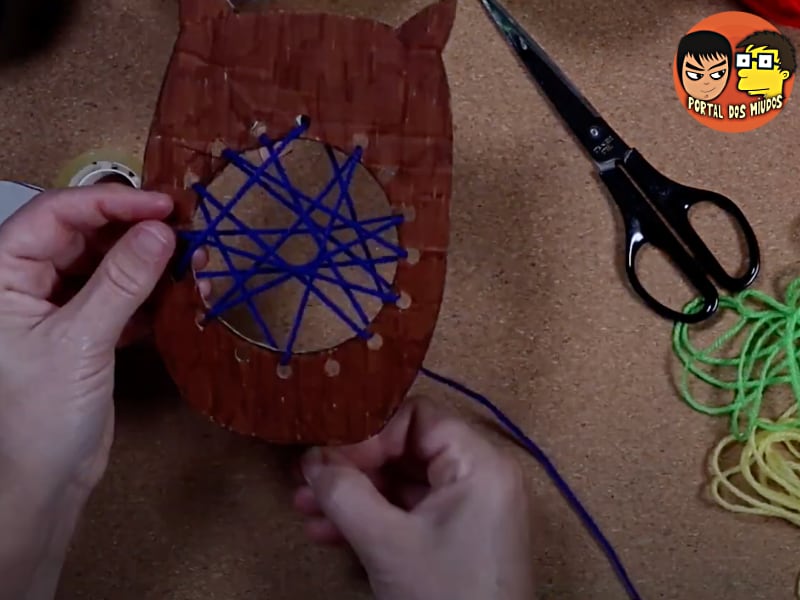
- When the yarn has gone through all the holes, tie a knot in the back, and cut the rest.
- Repeat steps 9 and 10 for all wool yarns.
- Glue the eyes and the beak.
- Paint the wings you made out of cardboard.
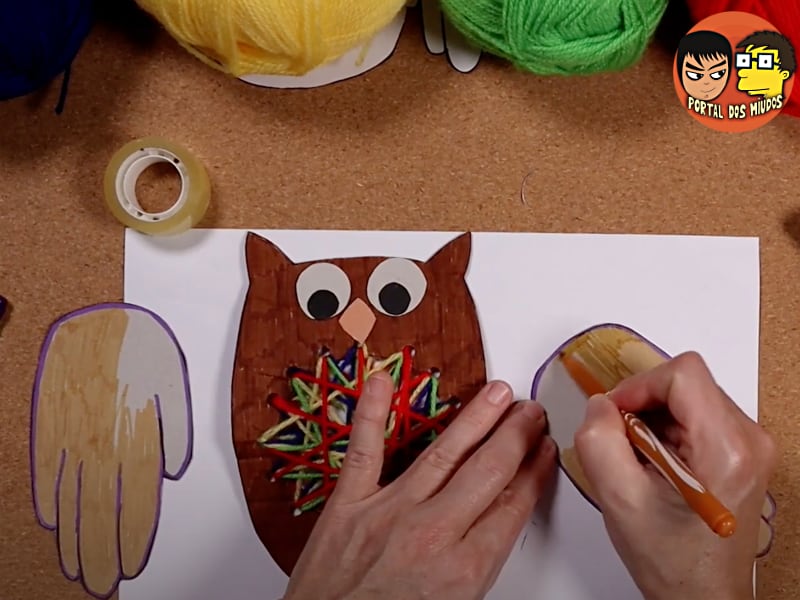
- Glue the wings behind the body, as in the image below. Finally, you can add decorations you want to your owl.
Download the outline of the owl’s body here:
Esta publicação também está disponível em:
![]() Português
Português